Organizing Your Counters / Chips
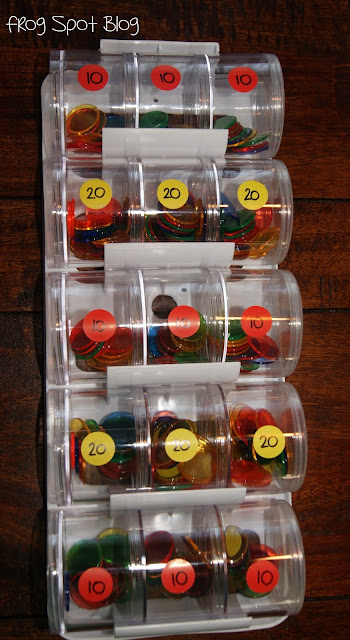
I have always had little plastic tubs of counters (you might call them 'chips') in my classroom, in ready-to-go sets of ten and twenty. It makes small group learning a breeze and allows for more fluid activities and learning targets. You can set up an activity quickly as you respond to daily growth in counting and arithmetic strategies. You can quickly hand out exact sets of counters and implement a hands-on activity in minutes. This year I was introduced to a great idea for storing containers of counters. I normally use up a few of my precious tote-trays (tubs) with my sets. This idea will save you so much space as you can screw them to the wall!
They are sewing/craft organizers. For my Australian friends, I found these ones at Big W - and they are on sale this week for $10 (normally $15).
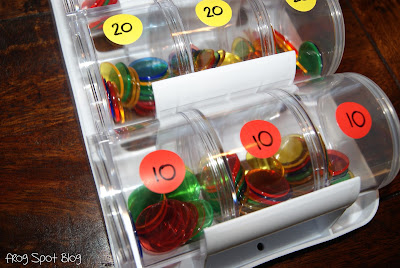
Each section has three round clear plastic tubs that screw together. I added a sticker for my sets of ten and twenty. If you have older students, you could make sets of 50 or 100!
Simply untwist them to hand them out to your students.
Then each set of 3 sits nicely in the bracket. TOO easy! Is it sad that I am looking forward to full time work again so I can gets these babies screwed up on the wall!! I am thinking in a nice little spot that cannot be filled with cute posters or shelving! I am ALL about making every space in the classroom useful, functional (and cute if possible)!
Speaking of counters, as well as having sets like these, I also like to have numbered sets. Just write numbers on with a marker and use them for number sequencing and counting activities - like my new 'Piggy in the Middle'.
This game/center can be used as a write'n'wipe activity OR use numbered counters - students work out the number that comes in the middle of the sequence.
Have you dropped by my Facebook page yet to become a 'fan'. In the 'Fans Only' tab you will find a new freebie - a simple subtraction worksheet - inspired by my daughter's sudden fascination with subtraction!


